

Running out of iCloud space? Good news—Apple provides free, unlimited temporary iCloud storage when you’re setting up a new device and don’t have enough existing space to perform a full backup. This feature, available since iOS 15, gives you peace of mind during device transfers.
1. Why Temporary iCloud Storage Exists
If your iPhone doesn’t have enough space in iCloud for a full backup, Apple steps in with a temporary storage vault—no extra cost, unlimited capacity, and valid for up to 21 days. Use it to backup everything from apps and settings to photos and messages, then restore it onto your new device during setup
2. Creating the Temporary Backup on Your Old iPhone
- Update to the latest iOS: Go to Settings → General → Software Update to ensure you’re up-to-date.
- Access the transfer feature: Open Settings → General → Transfer or Reset iPhone.

- Tap Get Started under the “Prepare for New iPhone” section.
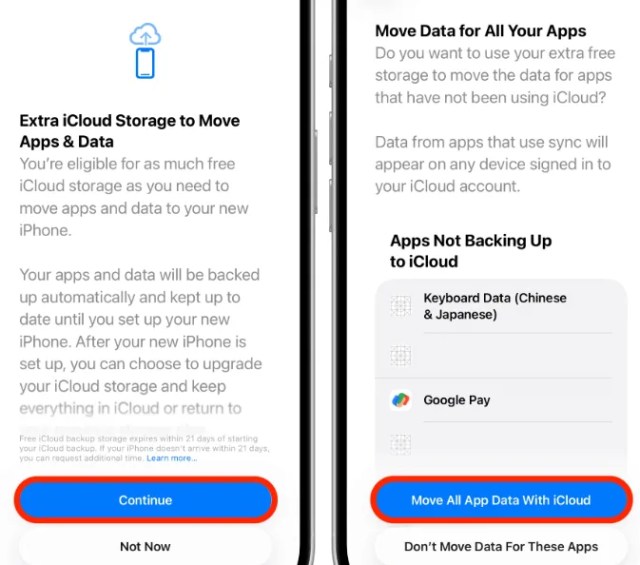
- If prompted, enable iCloud Backup to Transfer.
- If there’s insufficient storage, Apple will offer temporary iCloud storage—tap Continue
- Choose Move All App Data With iCloud, or selectively move data if preferred
- Tap Done to start the backup. Keep your iPhone connected to Wi‑Fi and power throughout the process
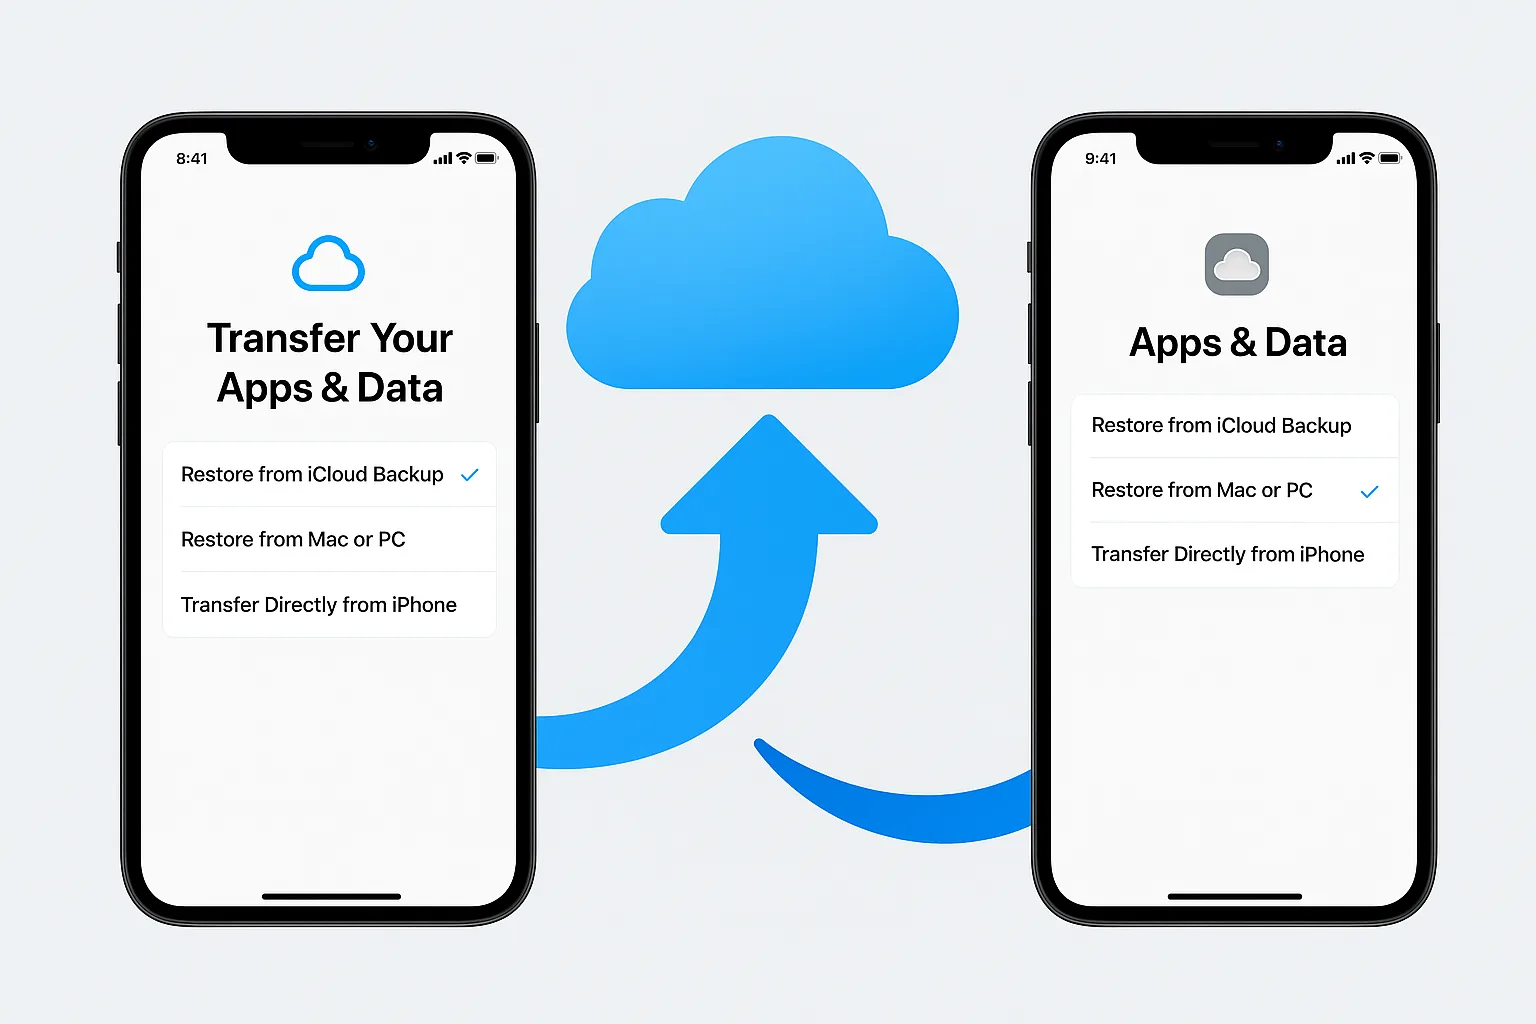
3. Restoring from the Temporary Backup on Your New iPhone
- Turn on your new iPhone and begin setup.
- When you reach the Apps & Data screen, select From iCloud Backup.

- Sign in using your Apple ID.
- Choose the most recent temporary backup to proceed with restore
- Let the restore complete—stay connected to Wi‑Fi and power. Apps, settings, and data will restore over time in the background.
4. Timelines & What Happens After
| Stage | Duration / Info |
|---|---|
| Before backup expiration | 21 days to restore to new device |
| After restoring to new device | Temporary backup remains for 7 days before deletion |
| Need more time? | Tap Keep My Backup Longer in Settings or contact Apple Support for extension |
5. Tips & Best Practices
- Don’t erase your old device until the backup has been successfully restored to the new one.
- For long transfers, keep devices connected to power and Wi‑Fi for a smooth experience.
- If you anticipate needing ongoing storage, consider upgrading to iCloud+. Otherwise, you can return to the free plan after transfer.
- If the backup fails or stalls, you can cancel it via Settings → [your name] → iCloud → iCloud Backup, or select Back Up Now to retry.
Closing Note:
This seamless backup and restore feature ensures hassle-free device transitions. And once you’re set up, you can choose to upgrade to iCloud+ or revert to a free storage plan—it’s entirely up to you.